Photography Blog
Better Photos for Your Used-Car Listing
Good listing photographs make a car appear tidy, valuable and worth taking seriously. You do not need unusual tricks, only careful preparation and a consistent approach.
So you want to sell your car. Excellent. The question is whether you genuinely want to sell it or simply keep renewing the advert for the next six months.
If the second option sounds appealing, photograph it at night in a crowded car park using the flash on your phone while holding a takeaway coffee in your other hand.
If you would prefer the car to attract serious interest, keep reading. Even a modern phone can create useful listing photographs when the vehicle, location, light and image sequence are handled carefully.
The photographs are often the first part of the advert a potential buyer evaluates. A good car can easily be ignored when the images are dark, confusing or incomplete.
The essential photograph list
When buyers need to guess what parts of the car look like, they may not spend time asking for more photographs. A useful advert answers the most obvious visual questions immediately.
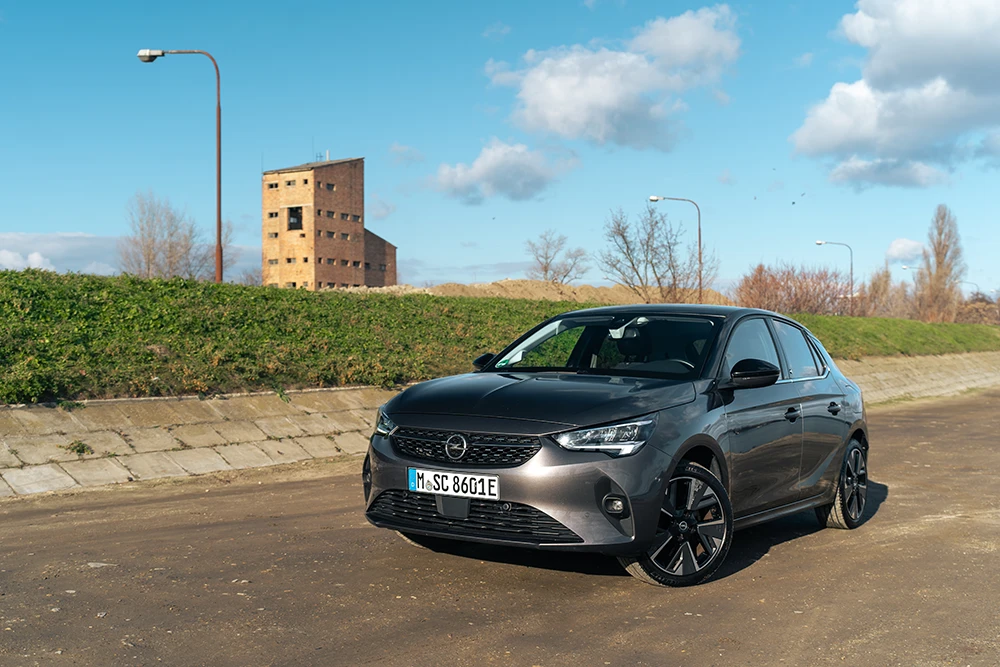
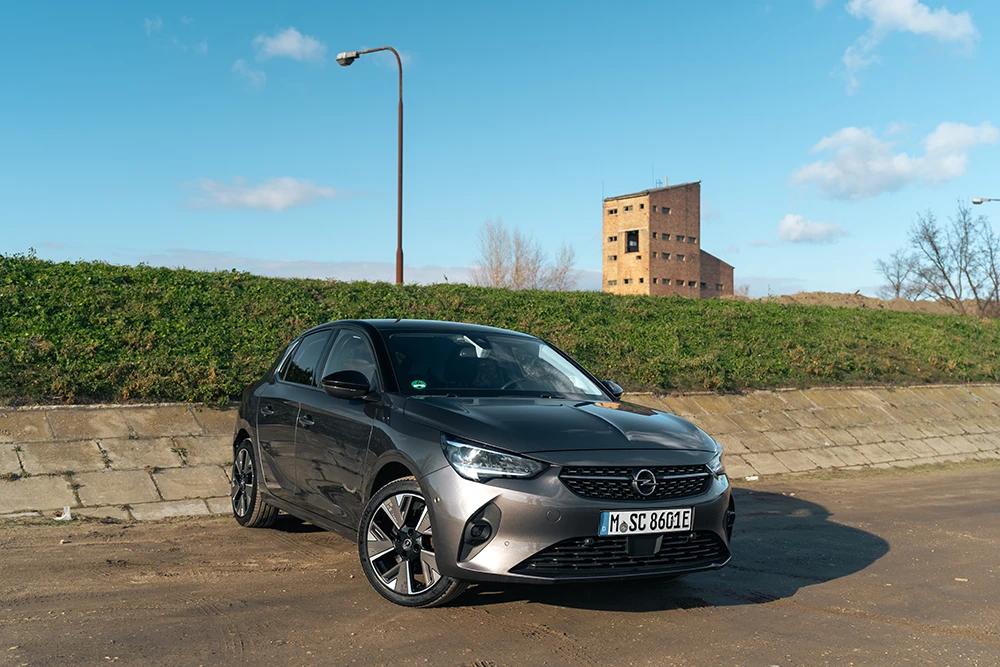
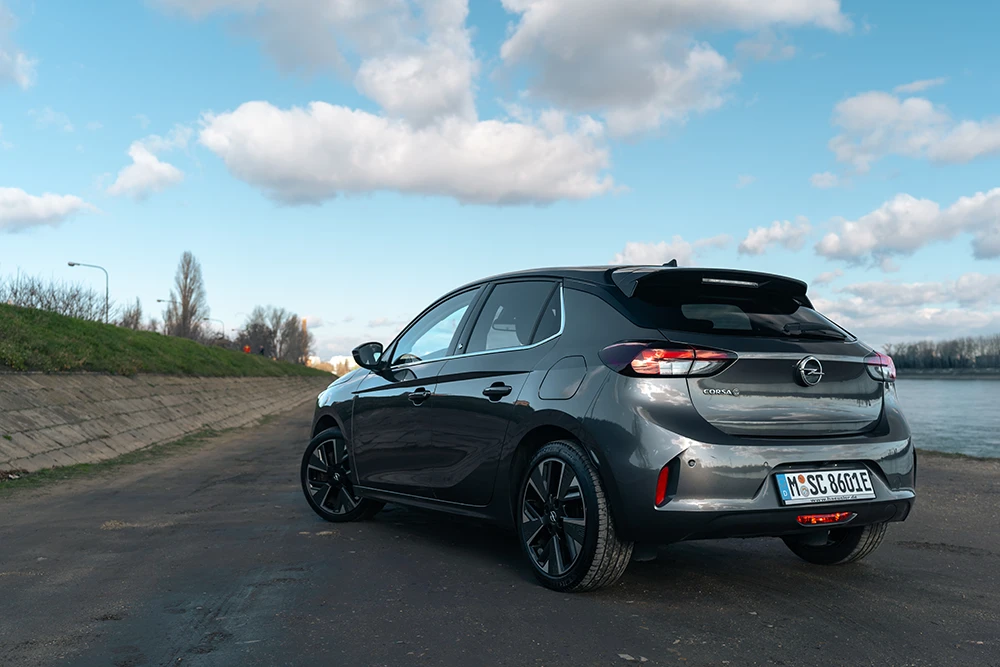
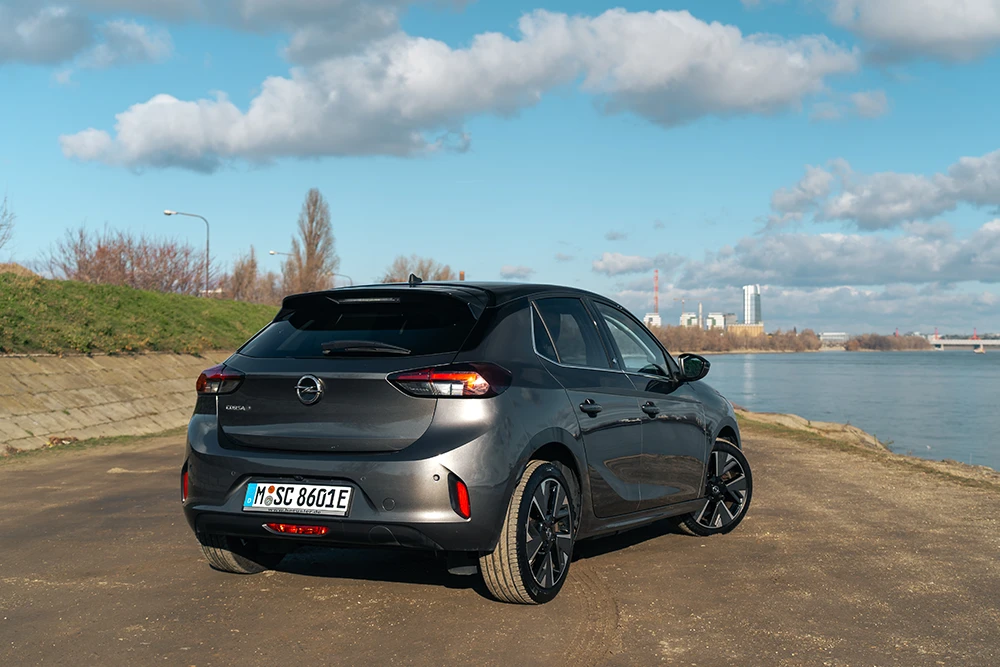
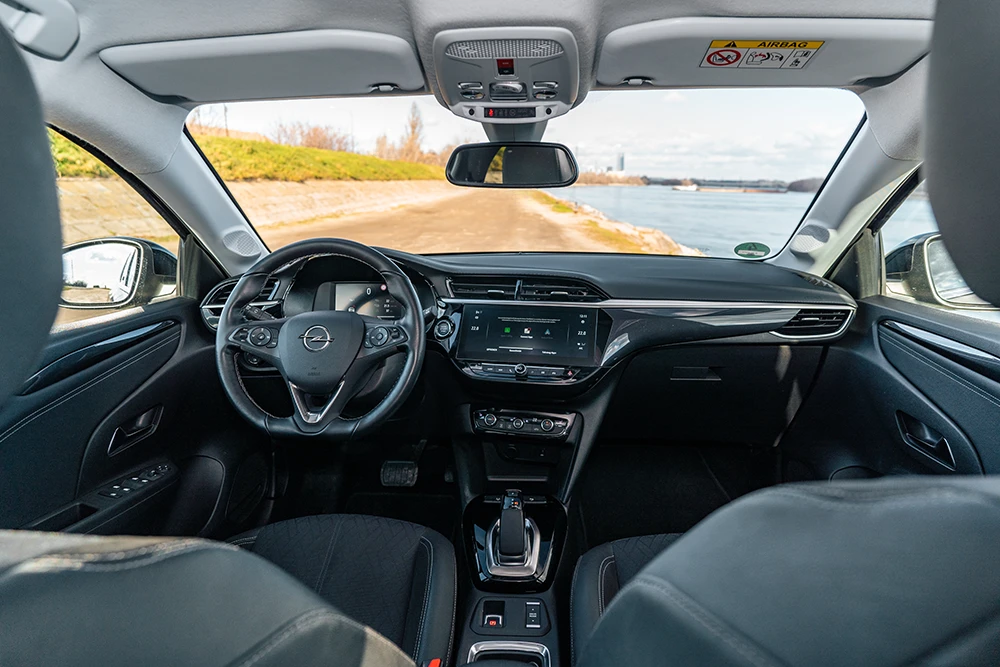
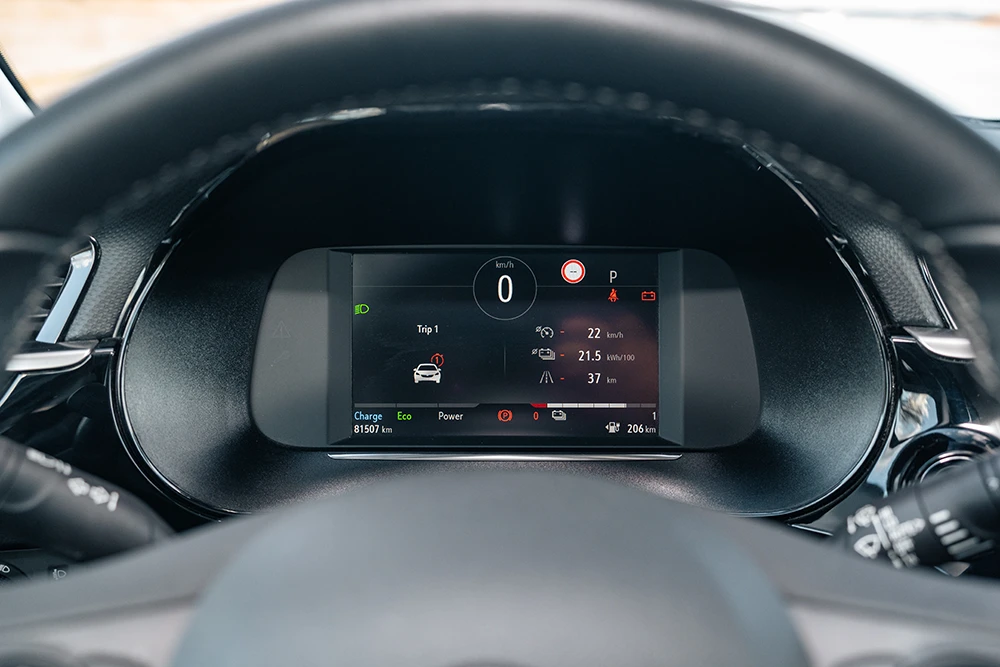
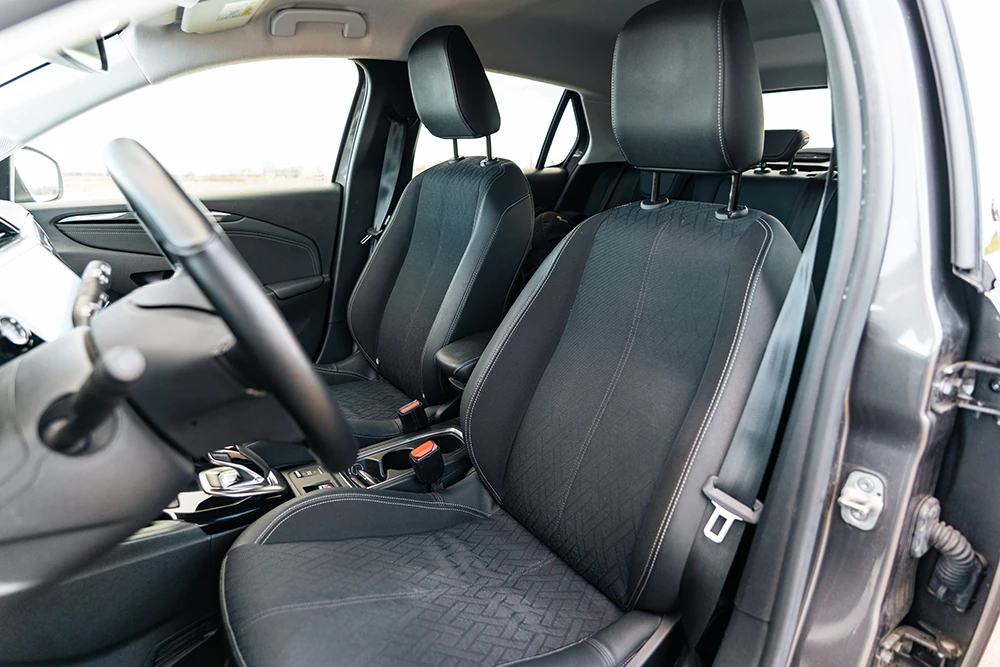
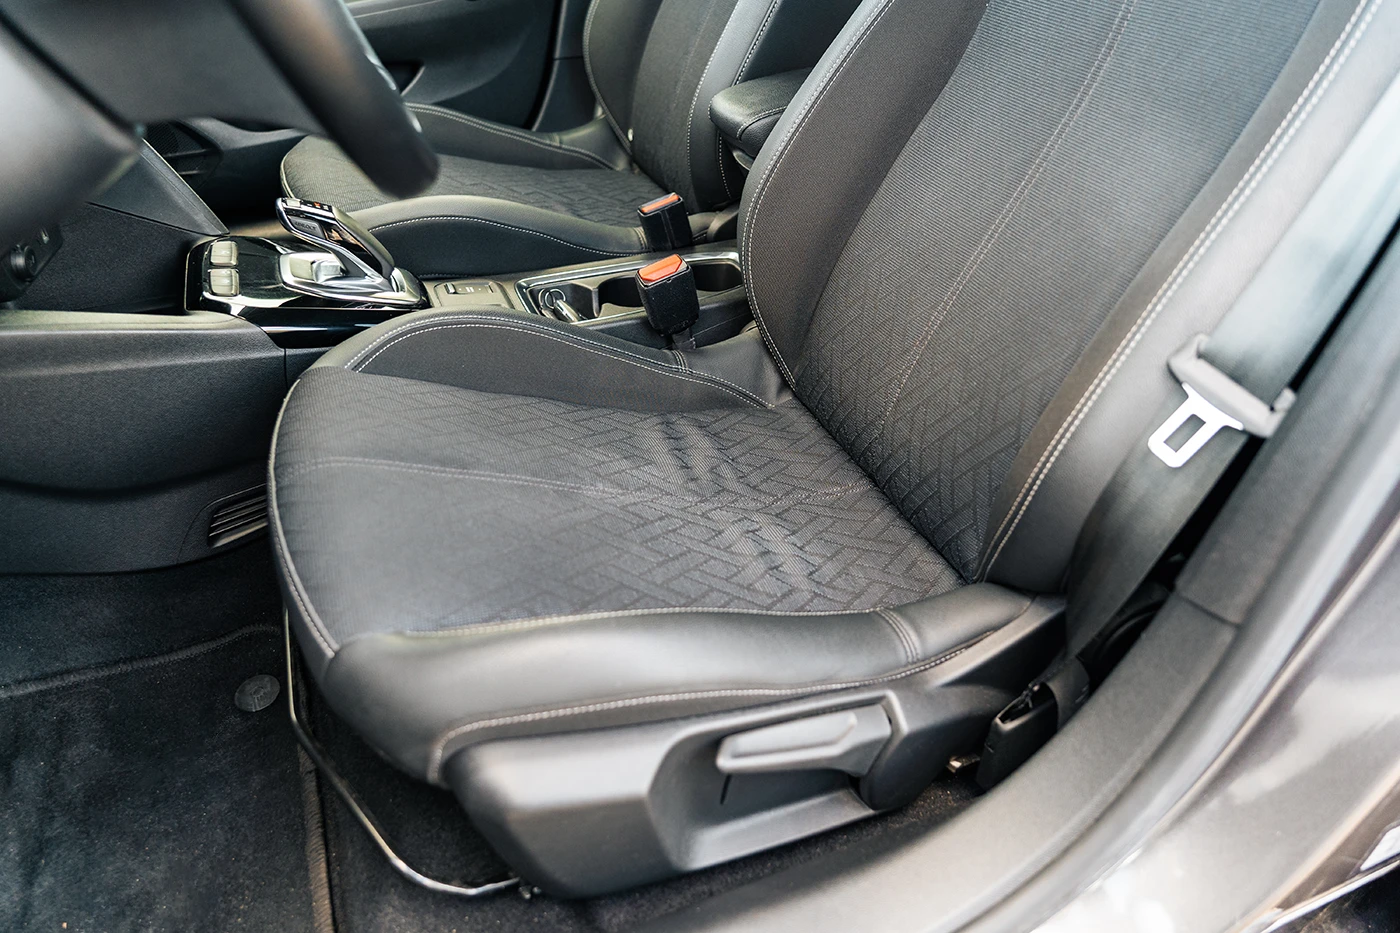
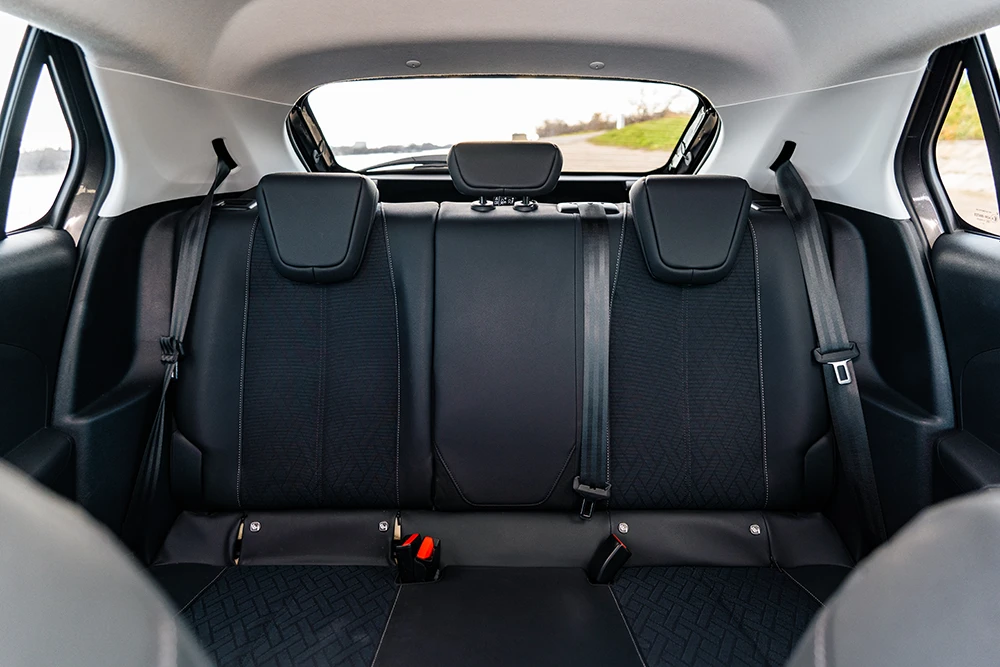
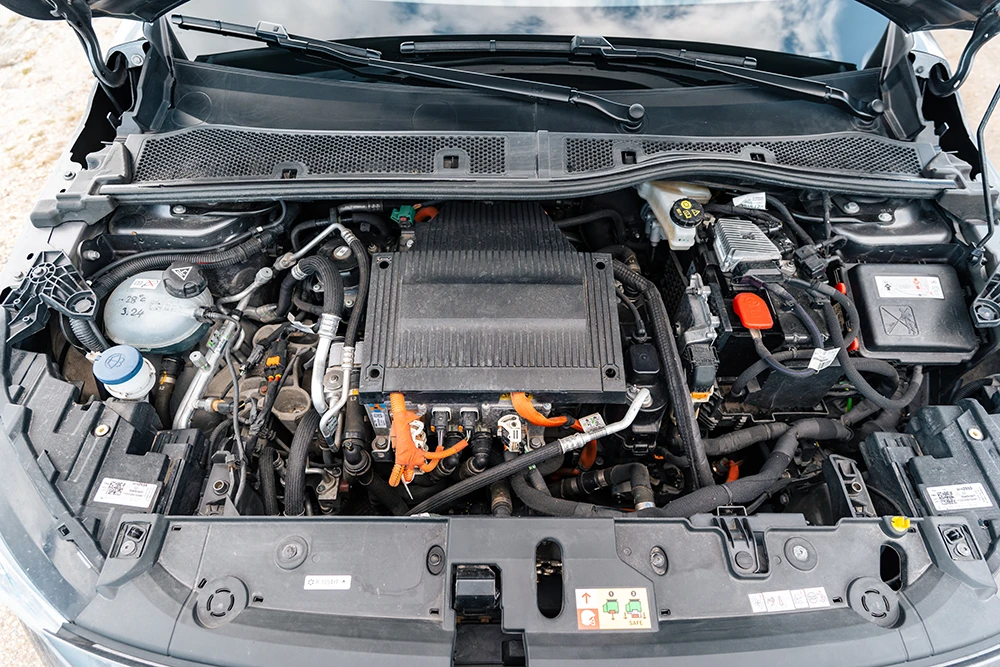
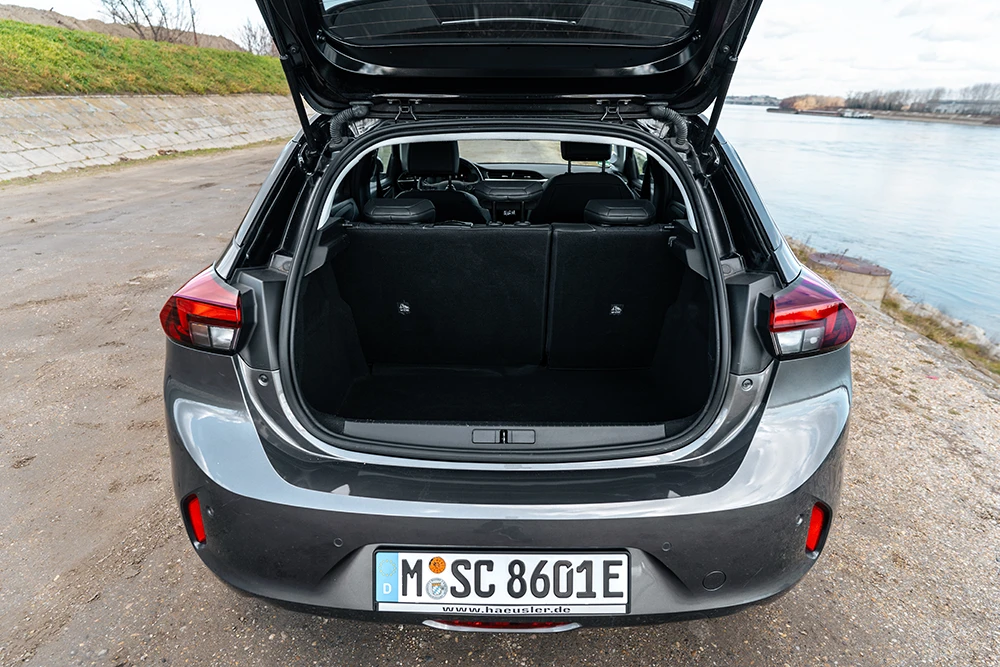
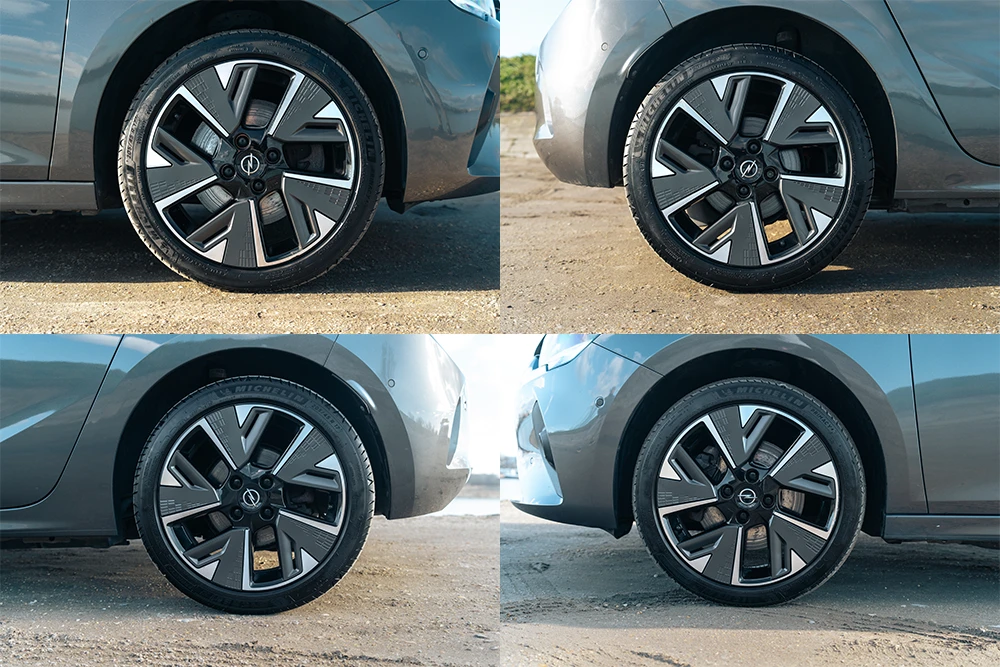
Create additional photographs when the advertising platform allows them. Show important equipment, optional features and any damage or condition-related details that a serious buyer should know about before arranging a viewing.
🚨 The worst car-photography mistakes
If you remember only one part of this article, avoid the following problems.
-
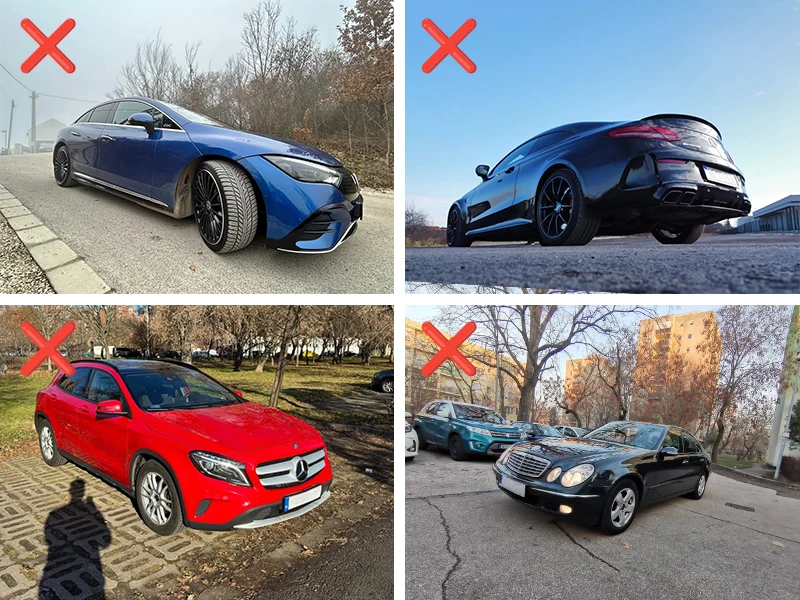
❌ A tilted car distorted by an ultra-wide-angle lens
If the vehicle looks as though it belongs in a cartoon, the photograph will not help buyers understand its real shape. -
❌ Blurry, overexposed or excessively dark images
You are not creating an action-film poster. Buyers need to see the condition, colour and important details of the vehicle clearly. -
❌ Other cars, bins and distracting objects in the background
The buyer should not need to work out which vehicle is being advertised. Avoid poles, trees and signs appearing to grow from the roof. -
❌ The tyre tread facing the camera
When photographing a three-quarter exterior view, turn the steering so the wheel face remains visible rather than presenting only the tyre.
✅ How to photograph a car properly
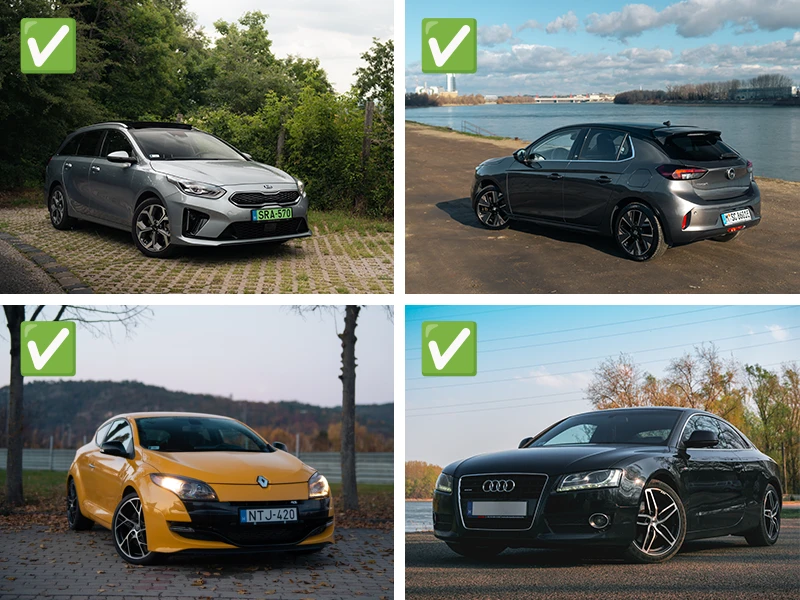
You now know what to avoid. The next step is preparing the vehicle and creating a consistent image collection.
Before the shoot: prepare everything properly
Good car photography begins before you open the camera application. The strongest viewpoint cannot rescue a dirty vehicle, cluttered interior or greasy fingerprint across the phone lens.
-
⭕ Wash the exterior and clean the interior
Clean bodywork, glass, wheels and tyre sidewalls make the car appear better maintained. Vacuum the interior, wipe the main surfaces and prepare the luggage compartment as well. -
⭕ Remove personal belongings
Take out bottles, tissues, charging cables, parking receipts, coins and anything else that does not belong in the advert. -
⭕ Clean the camera lens on your phone
A fingerprint on the lens creates hazy highlights and reduces contrast. Clean it with a suitable soft cloth before beginning and check it again during the shoot. -
⭕ Choose a suitable location
Use either a simple and uncluttered background or a more distinctive location that still keeps the car as the main subject. Make sure there is enough room to photograph it safely from every required direction. -
⭕ Decide how you will handle the number plate
A visible number plate may help buyers check the vehicle’s history, while some sellers prefer to hide it for privacy. Decide in advance, follow the rules of the advertising platform and obscure it during editing when required.
During the shoot: light and composition
A clear photograph helps sell the car. Poor lighting usually leads to repeated questions about its colour, condition and details.
-
⭕ Avoid the ultra-wide-angle camera
The widest camera on a phone can stretch the ends of the vehicle and significantly distort its proportions. Use the main camera and step farther back instead. -
⭕ Avoid heavy digital zoom
When your phone does not have a dedicated telephoto camera, digital zoom usually reduces image quality. Move closer when possible while maintaining a natural perspective. -
⭕ Keep the phone level
A dramatic diagonal angle makes it more difficult to judge the real stance and shape of the vehicle. Keep the camera straight and correct small errors afterwards. -
⭕ Make the car appear level
Use the horizontal lines of the vehicle as your main reference. Roads and car parks may slope, so the visual balance of the car can matter more than a distant horizon. -
⭕ Do not crop off parts of the vehicle
Include the complete car in the main exterior photographs. Crop closely only when you are deliberately creating a detail image. -
⭕ Leave space around the car
Do not allow the vehicle to touch every edge of the frame. A little breathing room makes the photograph easier to crop for different advertising platforms. -
⭕ Check the background before every photograph
Look for trees, poles, signs, people and other vehicles that overlap awkwardly with the bodywork. -
⭕ Keep the foreground clear
A bush, railing or parked scooter hiding part of the car makes it harder to assess its condition. -
⭕ Turn the steering wheel deliberately
For angled exterior photographs, turn the wheel so the alloy wheel faces the camera rather than the tyre tread. -
⭕ Photograph from approximately waist or headlight height
Most passenger cars look natural when the camera is positioned close to the height of the beltline or headlights. Crouch down rather than photographing every view from standing eye level.
More advanced tips
Once the basic composition and lighting are under control, the following ideas can improve the photographs further.
-
⭕ Use a circular polarising filter
A CPL filter can reduce selected reflections on glass and painted surfaces. Its effect changes as the filter rotates, so check the complete car rather than removing every reflection automatically. -
⭕ Try portrait mode carefully
Software-generated background blur can work for a detail photograph, but it often makes mistakes around mirrors, windows and the outline of the vehicle. Reduce the blur strength and switch back to the normal camera mode when the edges look unnatural. -
⭕ Use a tripod or stable support
A small tripod or another stable surface can help keep the photographs sharp when the available light is lower. Avoid photographing so late that the car’s condition and colour become difficult to see. -
⭕ Use reflections deliberately
Clean reflections of the sky or surroundings can make the bodywork look polished. Make sure they describe the shape of the vehicle rather than hiding it beneath visual clutter. -
⭕ Photograph in RAW when it genuinely helps
RAW files provide greater flexibility when correcting exposure and colour, although they also require editing before use. A well-exposed photograph from the normal phone camera is still better than a poorly processed RAW file.
After the shoot: selecting and editing the photographs
Once you have created a useful collection, resist the urge to upload everything immediately. Careful selection and light editing can make the advert considerably easier to understand.
-
⭕ Decide whether the number plate should remain visible
A visible registration number may allow buyers to check the vehicle’s history and can support transparency. When privacy is more important, obscure it consistently in every delivered photograph. -
⭕ Remove weak photographs from the collection
Delete images that are blurry, heavily tilted, too dark, overexposed or visually confusing. More photographs do not automatically create a stronger advert. -
⭕ Crop, rotate and straighten carefully
Small corrections can improve the balance of the image. Avoid cropping so tightly that important parts of the vehicle disappear. -
⭕ Do not over-edit the car
Moderate adjustments to brightness, colour and contrast are useful. Heavy HDR effects, unrealistic saturation and artificial background blur make it more difficult to assess the true appearance of the vehicle. -
⭕ Write a useful description
The photographs attract attention, but the written description confirms the buyer’s decision. Include the year, mileage, engine, equipment, maintenance history and known faults rather than relying on generic phrases.
When the collection is prepared carefully, the advert becomes easier to understand and you may receive fewer repeated questions about details already visible in the photographs.
Frequently asked questions about used-car photography
How many photographs should I take? 📸
Create more photographs than you expect to upload so you have enough options during selection. Twenty to thirty images can provide a useful starting collection, but only upload photographs that add clear information or show a genuinely different view.
How many photographs can I upload to a car marketplace? 🖼️
Image limits, subscription levels and prices can change, so check the current rules of the platform before preparing the final advert.
- Használtautó.hu: Check the image allowance of the current listing package and use the available positions for clearly different exterior, interior and detail photographs.
- Jófogás: Basic and promoted listings may provide different image allowances.
- Facebook Marketplace: The permitted number and format of images can change with updates to the platform.
- Dealership websites: Limits and recommended ratios depend on the individual website and inventory system.
When space is limited, prioritise complete exterior views, the dashboard, front and rear seats, mileage, luggage compartment, engine bay, wheels and any visible damage.
What kind of location should I choose? 📍
A simple background is generally the safest option.
- Choose an empty car park, quiet road or clean wall with enough space around the vehicle.
- A scenic location can also work, but the background should not become more noticeable than the car.
- Avoid crowded residential car parks, rubbish containers, busy traffic and other vehicles entering the frame.
What time of day should I take the photographs? 🌞
- Morning or late afternoon: Lower sunlight generally creates softer reflections and fewer harsh highlights.
- Cloudy weather or open shade: Even light makes it easier to show the paintwork and interior clearly.
- Avoid harsh midday sunlight: Strong overhead light can create deep shadows and bright reflections that hide important details.
What camera should I use? 📷
- A modern phone is sufficient when the lens is clean and the light and composition are handled carefully.
- Use the main camera rather than the ultra-wide-angle mode, which can distort the proportions of the vehicle.
- A dedicated camera provides more control, but it does not replace preparation, useful viewpoints or clear lighting.
How much editing should I use? 🎨
- Correct the exposure, white balance, crop and small distractions when required.
- Keep the colour of the paintwork and interior realistic.
- Do not remove scratches, dents or faults that could affect a buyer’s decision.
- Avoid heavy HDR effects, extreme contrast and filters that make the car look different from reality.
How should I choose the strongest photographs? 🎯
When the advert limits the number of images, prioritise the following:
- front and rear three-quarter exterior views;
- views showing both sides of the car;
- dashboard and driver’s seat;
- instrument cluster with the mileage visible;
- engine bay and luggage compartment;
- wheels and tyres;
- any damage or condition-related detail a buyer should know about.
How should I write the advert description? 📢
The photographs attract attention, while the written information supports the buyer’s decision.
- Include the year, mileage, engine, transmission and important equipment.
- Mention recent servicing, new parts and other genuine advantages.
- Describe known faults honestly rather than allowing the buyer to discover them unexpectedly.
- Avoid generic claims such as “perfect condition” when the description provides no supporting information.
How available should I be to potential buyers? 📞
- Provide at least one contact method you genuinely monitor.
- Reply within a reasonable time, particularly when somebody asks a clear and relevant question.
- Offer serious buyers a viewing and test drive as soon as practical.
- State any preferred contact hours or methods clearly in the advert.
Final thoughts
If you have reached this point, you now know how much preparation goes into a useful collection of used-car listing photographs.
When you would rather avoid spending your time finding the location, managing the light and editing the complete image sequence, professional photography provides a simpler option.
A clear and consistent collection can support stronger interest, reduce unnecessary questions and give serious buyers a better understanding of the car before they arrange a viewing.
Further practical advice about photographing a used car is available in TotalCar’s Hungarian-language guide.